


How to Improve Grip Strength: A Practical Guide for Athletes
Improving your grip isn't just about squeezing a stress ball. It's the dedicated process of training your hands and forearms with specific, challenging exercises that build crushing, pinching, and supporting strength. For serious athletes, a strong grip is the final, non-negotiable link in the kinetic chain.
A smart training plan integrates dedicated grip exercises like heavy carries, hangs, and gripper work after your main lifts, roughly 2-3 times per week. This protocol allows for the progressive overload needed for real gains while giving your hands adequate time to recover. Do this consistently, and you’ll turn a weak link into a performance asset.
Why Your Grip Is the Ultimate Performance Bottleneck

Your ability to lift heavier, climb harder, and dominate in your sport often boils down to one simple, overlooked factor: how strong your hands are. This isn't just about a firm handshake; it’s a direct link to your performance potential and a surprisingly accurate indicator of total-body strength.
For a powerlifter, a failed grip on a max-effort deadlift means a failed lift—period. It doesn't matter how strong your posterior chain is. In Olympic weightlifting, a shaky hook grip can kill a clean or snatch before the bar even leaves the ground. Elite lifters understand this: their total is capped by what their hands can hold.
The Three Pillars of Grip Strength
Grip isn't a single skill. It's a combination of three distinct types of strength, and a well-rounded athlete needs all three for peak performance.
- Crush Grip: This is the classic "squeezer" strength—the force you generate between your fingers and palm. Imagine crushing a can or closing a heavy-duty hand gripper. It’s what you need to lock onto a barbell during a heavy row or bench press.
- Pinch Grip: This is the power between your thumb and fingertips. It’s what lets you pick up weight plates by their edge or allows a climber to hang from impossibly thin ledges, known as "crimps."
- Support Grip: This is your endurance—the ability to hold on to something for an extended period. Farmer's walks and dead hangs are the ultimate tests. This is the strength that keeps you connected to the bar for high-rep sets or glued to the wall on a long climbing route.
A strong grip is the final connection between your body and the weight. If that connection breaks, all the force you generate with your legs, back, and shoulders is wasted. It’s the last, non-negotiable link in the chain.
Beyond the Barbell: A Link to Longevity
Beyond the gym, grip strength is a well-documented biomarker of overall health. Multiple studies have shown a powerful link between hand strength and long-term health outcomes.
One landmark study found that for every 5 kg decrease in grip strength, there was a 16% higher risk of all-cause mortality. That’s a powerful statistic. It shows that building and maintaining a strong grip isn't just for setting new PRs; it’s a serious investment in your resilience for decades to come.
Top athletes don't treat grip work as an afterthought—it’s a core part of their training. They know that to unlock their true potential, they have to strengthen their hold first. And to get the most out of every session, you need the right tools—learn more in our guide on liquid chalk for weightlifting.
Understanding the Mechanics of a Powerful Grip
Before building an unbreakable grip, you must understand what you’re actually training. A monster grip isn't just about having strong hands. It's a complex system—a network of muscles, tendons, and bones all firing in perfect sync.
Thinking you can build elite grip by just squeezing a stress ball is like trying to build a world-class squat by only doing leg extensions. You're missing the big picture.
The real engines powering your grip are in your forearms. The flexors on the palm side and the extensors on top are responsible for the powerful movements of your wrist and fingers. When a powerlifter pulls a max deadlift, it’s those massive forearm flexors, like the flexor digitorum superficialis and profundus, that are working to keep their fingers clamped around the bar.
The forearms don't work alone. Your hands also house smaller, more intricate intrinsic muscles. They handle fine motor control and precision, but their role in raw strength is critical. For a climber hanging from a razor-thin "crimp," the power of these intrinsic hand muscles is what keeps them on the wall.
The Role of Wrist Stability
Think of your wrist as the bridge that transfers force from your body, down your arm, and into your hands. If that bridge is shaky, the power you generate is lost. An unstable, bent wrist immediately puts your forearm muscles at a huge mechanical disadvantage, torpedoing your ability to generate and hold serious force.
Picture a collegiate gymnast on the rings. Their ability to hold an iron cross depends on more than just shoulder and back strength. They need locked-in, rigid wrists that create a perfect channel for force. If their wrists break form for a second, the entire movement collapses. This is why targeted wrist work is a non-negotiable part of any serious grip program.
Your kinetic chain is only as strong as its weakest link. For many athletes, an unstable wrist is that link, creating a "power leak" that sabotages heavy lifts and complex movements before they begin.
Connecting Muscles to Movement
When you understand which muscles do what, you can stop guessing and start training with purpose.
A plate pinch, for instance, isn't just a hand exercise; you're directly hammering the thenar muscles at the base of your thumb. A heavy farmer's walk is a brutal lesson in isometric endurance for your forearm flexors. This knowledge transforms your training from a random collection of exercises into a targeted assault on specific weaknesses.
The table below breaks down the connection between the type of grip, the muscles doing the work, and how it all plays out in high-performance athletics.
The Three Pillars of Grip Strength
This table breaks down the three primary types of grip strength, the muscles they engage, and their application in real-world athletic movements.
| Grip Type | Description | Primary Muscles Involved | Athletic Example |
|---|---|---|---|
| Crush Grip | Force generated between the fingers and palm, like closing a hand gripper. | Flexor Digitorum Profundus & Superficialis | Gripping a barbell during a heavy bench press or row. |
| Pinch Grip | Strength between the thumb and fingertips. | Thenar Muscles (thumb), Flexor Pollicis Longus, Adductor Pollicis | A rock climber holding a thin "crimp" hold. |
| Support Grip | The ability to maintain a hold for an extended period. | Forearm Flexors & Extensors (isometric endurance) | A strongman competitor completing a max-distance farmer's walk. |
Use this as your roadmap. Identify which area of your grip needs the most work, and then pick the right exercises to attack it. This focused approach is the key to figuring out how to improve grip strength effectively and efficiently.
Your Grip Training Exercise Arsenal
This is where we put theory into practice. Building an elite grip demands a smart, targeted approach that goes beyond the grip work inherent in your regular lifts.
Think of these exercises as your arsenal. Each is a specific tool designed to forge strength where it counts, whether you’re fighting to lock out a deadlift, hanging on through the crux of a climb, or hauling an awkward object in a competition.
Systematic training is the secret. Research confirms that structured training delivers significant, measurable gains. One study found that even a 12-week program can produce a 7.0% increase in grip strength, proving how responsive our hands and forearms are to focused work. For serious athletes, this isn't news—it's confirmation that consistent, targeted effort pays off.
Forging Crushing Strength
Crush grip is raw power. It’s what lets you hold a heavy barbell like it’s glued to your hand. This is the squeeze that keeps the weight from slipping during heavy rows, pulls, and presses. Neglecting it is like building a race car engine but attaching the wheels with loose bolts.
Hand Grippers These are the most direct tools for building crushing strength. Invest in a set of high-quality, progressive-resistance grippers.
- How to do it: Set the gripper deep in your palm. Squeeze with a full, controlled motion, aiming to make the handles touch. Hold the contraction for a second at the peak, then release slowly.
- For the Powerlifter: A competitive lifter needs to simulate the intense, brief force required to hold a max deadlift. The goal is peak force, not endurance. A solid protocol is 3-5 sets of 5-8 reps, putting maximum effort into every close.
Axle Bar or Fat Grip Lifts Lifting with a thicker bar dramatically increases the demand on your crushing grip. Because the diameter is wider, your hand has to work overtime to hang on, turning any standard lift into a serious grip-builder.
- How to do it: Perform deadlifts, rows, or overhead presses with a dedicated axle bar, or use fat grips on a standard barbell. Keep the weight submaximal so your grip is the limiting factor, not larger muscles.
- For the Strongman: Many strongman competitors train their overhead press exclusively with axle bars. This not only builds a monstrous grip but also develops the wrist stability needed to control heavy, awkward implements.
Building a Vise-Like Pinch
Pinch strength is about the connection between your thumb and your fingers. It’s a more nuanced grip, but it's critical for climbers holding tiny edges, lifters handling plates, and anyone manipulating objects with precision and force.
Plate Pinches This is the classic, old-school test of pinch strength. It’s brutally effective and requires nothing more than a couple of weight plates.
- How to do it: Place two weight plates together, smooth-side out. Grip them with your thumb on one side and your fingertips on the other. Lift them and hold for time or walk for distance. Start lighter than you think—this one will humble you fast.
- An Old-School Goal: A benchmark of a formidable grip is pinching two 45 lb plates. Aim for sets of 15-30 second holds.
Hex Dumbbell Holds This variation hits your pinch grip from a slightly different angle, forcing your fingers to clamp down hard on the head of a hexagonal dumbbell.
- How to do it: Stand a hex dumbbell up on one end. Grip the head of the dumbbell with just your fingertips and thumb, lift it, and hold for time. Your palm should not touch the dumbbell.
Pinch grip is the ultimate measure of hand integrity. It proves your strength isn't just in the big muscles of your forearm—it runs all the way to the tips of your fingers. It’s the fine-tuner in your grip arsenal.
Developing Unbreakable Support Grip
Support grip is about endurance. It's your ability to just hold on. It’s what lets a climber hang through a long, pumpy route or a functional fitness athlete finish a high-rep kettlebell workout without dropping the weight.
Dead Hangs This is the purest and simplest test of support grip. It builds endurance in your forearms and strengthens the often-neglected ligaments and tendons in your hands and elbows.
- How to do it: Grab a pull-up bar with an overhand, shoulder-width grip. Let your body hang with your arms fully extended. Engage your shoulders slightly to keep the joint safe. Then, hold on for as long as you can.
- For the Climber: Elite climbers use various hang protocols on different holds—ledges, pockets, slopers—to build sport-specific endurance. For general strength, a great starting point is 3 sets of max-time holds, with 2-3 minutes of rest in between.
Farmer's Walks This is a true full-body movement with massive carryover to grip strength and overall stability. It teaches you to maintain a rock-solid grip while moving, breathing hard, and under a heavy load.
- How to do it: Grab a heavy dumbbell or kettlebell in each hand. Stand up tall, brace your core, and walk for a set distance or time. Keep your posture upright and your steps controlled.
- For the Competitor: In a World's Strongest Man competition, the farmer's walk is an iconic event. These athletes carry upwards of 350 lbs (160 kg) per hand. It’s a monumental test of support grip and pure willpower.
For any of these exercises, sweat can cut a set short. This is where a high-quality chalk becomes a performance tool. EVMT Liquid Chalk creates a dry, reliable surface on your hands, ensuring that your muscles—not a slippery grip—are the reason you end the set. This allows you to push every set further, creating a bigger stimulus for growth. For a better handle on how the right chalk can change your training, check out our guide on using chalk for grip enhancement.
Programming Grip Work for Maximum Gains
If you want a dominant grip, you need a plan—a clear strategy that weaves targeted work into your existing training without compromising recovery or performance. This is the difference between slow progress and consistent, measurable gains.
The foundation of any smart strength program is progressive overload. The concept is simple: to get stronger, your muscles must adapt to a stress that’s slightly more than what they’re used to. For grip training, that means you can’t just squeeze the same gripper for three sets of ten every week. You have to systematically dial up the challenge.
Smart progression isn't just about piling on more weight. A skilled athlete knows how to manipulate every variable to keep the gains coming.
The Core Principles of Progression
Before we jump into specific templates, you must understand how to make your grip work harder over time. These are the dials you’ll be turning:
- Intensity (Load): The most obvious variable. You increase the weight you’re lifting, pinching, or holding. If you can farmer's walk 100 pounds for 50 feet, the goal is to hit 110 pounds.
- Volume (Sets & Reps): Doing more total work. You might add another set to your dead hangs or push for a few more reps with your hand gripper.
- Time Under Tension (Duration): For isometric holds like hangs, your main tool is the clock. A 30-second hold becomes a 35-second hold.
- Decreased Rest: Slicing the rest time between sets forces your muscles to recover faster under fatigue. This is a great way to build endurance and work capacity.
- Increased Difficulty: This is where you make the exercise mechanically harder. Swapping a standard dead hang for a towel hang, for example, cranks up the difficulty without adding weight.
Smart programming isn’t about obliterating your hands every session. It’s about applying a precise, calculated dose of stress, letting your body recover, and then hitting it with a slightly bigger dose next time. This methodical approach is the only sustainable path to building an elite-level grip.
To help you put this into practice, here's a quick guide on how to apply these principles to different types of grip exercises.
Grip Strength Progression Strategies
A practical guide for applying progressive overload to your grip training, ensuring continuous improvement and helping you break through plateaus.
| Exercise Type | Primary Progression Method | Secondary Progression Method | Example |
|---|---|---|---|
| Crush (Grippers) | Increase Resistance (Heavier Gripper) | Increase Reps / Add Sets | Move from a 150 lb gripper to a 200 lb one. Once you can do 8 reps, move up. |
| Pinch (Plate Pinches) | Increase Time Under Tension | Increase Weight (Heavier Plates) | Hold two 25 lb plates for 30 seconds. Next week, aim for 35 seconds. |
| Support (Hangs/Holds) | Increase Time Under Tension | Increase Difficulty (Use a Towel/Fat Grip) | Progress from a 45-second dead hang to a 20-second towel hang. |
| Wrist (Levering) | Increase Load | Slower, More Controlled Reps (Eccentrics) | Add a 2.5 lb micro-plate to your sledgehammer or mace for wrist curls. |
Remember, you don't have to stick to just one method. Combining these strategies—like adding a little weight and holding for a bit longer—is how you keep plateaus at bay.
Athlete-Specific Programming Templates
Your grip training needs to match your goals. A powerlifter’s needs are completely different from a climber's. These templates are frameworks you can plug into your weekly schedule. Plan on hitting these 2-3 times per week, usually at the end of your main workouts so you don't compromise your big lifts.
Template 1: The Strength Athlete (Powerlifter / Strongman)
The goal is maximal force and support strength for moving monster weights. This work directly supports your deadlift, carries, and overall pulling power.
-
Day 1 (After Deadlifts):
- Axle Bar Deadlift Holds: 3 sets of 15-20 second holds with 60-70% of your max deadlift.
- Plate Pinches: 3 sets per hand, holding for max time. Shoot for 20-40 seconds.
-
Day 2 (After Upper Body / Pressing Day):
- Heavy Farmer's Walks: 4 sets of 50-foot walks. Your main goal here is to add weight each week.
- Hand Gripper Closes: 3 sets of 5-8 reps with a challenging gripper. Squeeze with maximal intent.
Template 2: The Climber
For climbers, it’s all about endurance, raw finger strength, and the ability to hang on in awkward positions. We’re focusing on time under tension and sport-specific holds.
-
Day 1 (After Climbing Session):
- Max Dead Hangs (Standard Bar): 3 sets of max-time holds. Take a full 3 minutes of rest between sets and track your total hang time.
- Hex Dumbbell Holds: 3 sets per hand, holding for 30-45 seconds. This builds pinch endurance for slopers and crimps.
-
Day 2 (Non-Climbing Day or after a light session):
- Towel Hangs: 3 sets of max-time holds. This is a massive jump in difficulty and directly trains the ability to grip fabric or a gi.
- Rice Bucket Workout: 3-5 minutes of digging, squeezing, and extending your fingers to build the small antagonist muscles and promote hand health.
Template 3: The Functional Fitness Athlete
This athlete needs a bit of everything: a grip that can handle high-rep barbell cycling, heavy carries, and gymnastics. This program balances pure strength with rugged endurance.
-
Day 1 (After a Lifting-Heavy WOD):
- Fat Grip Farmer's Walks: 3 sets for max distance in 60 seconds. The thick grip will expose support strength weaknesses, especially under fatigue.
- Plate Pinches: 3 sets of 30-second holds per hand.
-
Day 2 (After a Gymnastics-Heavy WOD):
- Towel Pull-ups or Hangs: 3 sets to failure. This is a killer combo, building crushing and support grip at the same time.
- Kettlebell Bottoms-Up Press: 3 sets of 8-10 reps per side. An incredible movement for wrist stability and crush grip with huge carryover to other movements.
No matter which program you follow, consistency is everything. A tool like EVMT Liquid Chalk ensures a sweaty palm is never the reason a set ends early. It lets your muscles be the true limiting factor—and that’s non-negotiable for progressive overload. If your grip gives out before your muscles fatigue, you’re leaving gains on the table.
How to Test Your Grip and Track Progress
What gets measured gets managed. Random training leads to random results. A data-driven approach, on the other hand, lets you see what's working, make smart adjustments, and get tangible proof that your hard work is paying off.
The first step is to establish a baseline. Before you jump into a new grip program, you need to know where you stand right now. This isn't about comparing yourself to world-class athletes; it's about setting your own personal benchmark—a number you are committed to beating.
Standardizing Your Grip Strength Tests
Consistency is everything when tracking progress. To ensure your gains are real, you must standardize your testing conditions. That means doing your tests the same way, every single time.
- Test at the Same Time: Your strength fluctuates throughout the day. Pick a time—whether it's before or after your main workout—and stick to it.
- Use the Same Equipment: The diameter and texture of a pull-up bar can massively impact your hang time. Always use the same bar for your dead hang tests.
- Follow the Same Warm-up: Never test cold. A consistent warm-up gets your muscles and nervous system ready to perform.
- Apply Chalk Consistently: Using a grip aid like EVMT Liquid Chalk takes sweat completely out of the equation. By creating a perfect, dry grip every time, you can be confident that any improvements are from genuine strength gains, not just better conditions.
Actionable Grip Strength Tests
You don't need a fancy lab to get good data. These simple, effective tests can be done with standard gym equipment. Pick one or two that line up with your goals, get your baseline, and then re-test every 4-6 weeks.
1. Max-Effort Dead Hang for Time This is the purest test of your support grip endurance. It’s brutally simple, painfully honest, and all you need is a pull-up bar and a stopwatch.
- How to do it: Grab a pull-up bar with a standard overhand, shoulder-width grip. Let your arms hang straight, but keep your shoulders active—don't just sag in the joints. Start the timer and hold on for as long as you possibly can. The test is over the second your hands come off the bar.
- For the Climber: A collegiate sport climber might aim for hangs lasting well over two minutes. That kind of endurance directly translates to staying on the wall during long, demanding routes.
2. Farmer's Walk for Max Distance This test hammers your support grip while you're moving, building incredible mental toughness and full-body stability at the same time.
- How to do it: Grab a challenging but manageable pair of heavy kettlebells or dumbbells. Stand up straight, brace your core, and start walking along a pre-measured course. Your score is the total distance you cover before your grip gives out and you have to drop the weights.
Setting Meaningful Goals with Data
Once you start tracking your numbers, your training becomes a new game. A baseline gives you the power to set specific, realistic goals. Recent international research has set global benchmarks for handgrip strength, showing that it typically peaks between ages 30 and 39. Studies found that the average grip strength for women in the US and Europe is around 29 kg (64 lb), with men averaging 137 lb in clinical settings. While a dynamometer provides a clinical number, your performance on hangs and carries provides the real-world metrics that matter for athletic performance. You can discover more about these groundbreaking strength benchmarks on News-Medical.net.
This simple flow shows how to apply progressive overload to your grip training.
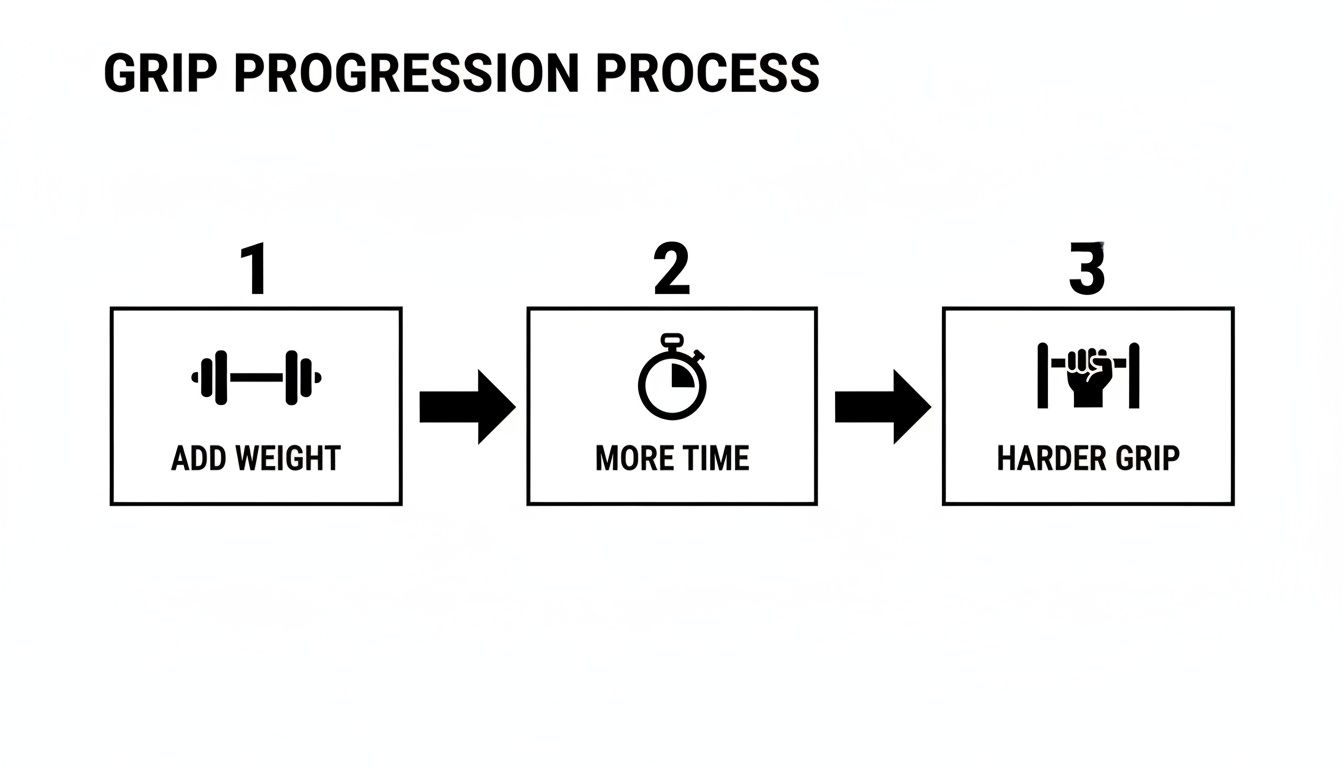
This illustrates a key principle: getting stronger isn't just about piling on more weight. It's about systematically increasing the demand on your hands through a mix of time, load, and mechanical difficulty.
Answering Your Top Grip Training Questions
Once you start taking grip training seriously, a few key questions always emerge. Figuring out how often to train, which tools to use, and how to take care of your hands is key to making consistent, long-term gains. Let's tackle the most common ones with direct, practical answers.
How Often Should I Train My Grip?
For most athletes, adding dedicated grip work 2-3 times per week is the sweet spot. This is typically done at the end of a main workout. This frequency provides enough stimulus to drive adaptation without over-taxing the smaller muscles in your hands and forearms.
For example, a powerlifter could add farmer's walks after deadlifts and dead hangs after their pull-up session later in the week. Your grip already gets significant work during heavy compound lifts; supplemental training hones in on weak points. Listen to your body—if you feel nagging elbow or wrist pain, it's a signal to back off. Recovery is just as important as the work itself.
Are Lifting Straps Killing My Grip Gains?
Lifting straps are a tool, not a crutch—when used correctly. Their purpose is to allow you to push target muscles (like your back during heavy rows) past the point where your grip would normally fail. For a bodybuilder, this is critical. It means they can truly overload their lats for more growth without being bottlenecked by forearm fatigue.
However, relying on straps for everything will sabotage your grip development. The smart strategy is to perform all warm-ups and sub-maximal sets raw to build foundational grip strength. Only use straps for your heaviest, all-out sets where the primary goal is to tax your back or posterior chain. Never use straps for dedicated grip exercises like hangs or carries.
What Is the Real Purpose of Using Liquid Chalk?
Liquid chalk is about one thing: consistency. It doesn't make a lift easier; it ensures a sweaty hand isn't the reason you fail. Think about any max-effort attempt—a one-rep max deadlift, a tough climbing route, or a high-rep kettlebell set in a competition. In those high-pressure moments, sweat is your enemy.
EVMT Liquid Chalk creates a dry, reliable surface on your hands so your actual muscular strength is the only limiting factor. It provides a clean, dust-free solution perfect for modern gyms, which is why it's used in countless high-level training environments. You can dive deeper into its advantages in our guide to using liquid chalk in the gym. It’s a simple tool that lets you train at your true limit, driving more strength and better long-term progress.
The goal isn't just to complete a lift; it's to get the maximum training stimulus from it. Chalk ensures that the stimulus goes to the intended muscles by removing grip failure as a variable. It lets you train strength, not sweat management.
How Do I Prevent My Hands from Tearing During Grip Work?
Consistent hand care is non-negotiable for consistent training. Ripping a callus can sideline you for days, halting your progress.
- Dial In Your Grip Technique: Pay attention to how you grab the bar. It should sit deep in the crease of your palm. If you hold it too high, the skin bunches up and is far more likely to tear against the knurling.
- Manage Your Calluses: You want to maintain your calluses, not remove them. The best time to do this is after a shower when your skin is soft. Gently file down the thick, high spots with a pumice stone. The goal is a smooth, tough layer of skin, not a sharp ridge that can catch and rip.
- Reduce Friction and Moisture: This is where a good chalk comes in. Using a product like EVMT creates a thin, protective barrier that drastically reduces the friction and moisture that cause blisters and tears, all while giving you a better hold.
Ready to eliminate grip as your limiting factor? EVMT provides a clean, mess-free liquid chalk engineered for athletes who demand a reliable hold. Train harder and lift heavier with a grip you can count on. Explore our collection of high-performance liquid chalk today.