


Climbing Chalk Pouch: The Complete Buyer and User Guide
You know the scene. You're at the base of the wall, one hand on the rope, the other fishing for chalk while your skin already feels damp. The wrong pouch turns that moment into a small hassle every single burn, spills powder into your pack, or makes you fight your own gear when you should be focusing on feet and breathing. A good climbing chalk pouch disappears into the climb and keeps grip where you need it, when you need it.
What a Climbing Chalk Pouch Does on the Wall
A climber notices the pouch most when it gets in the way. The opening is too floppy, the drawcord snags, or the bag swings into a knee right before a hard move. A good climbing chalk pouch works like a delivery point for magnesium carbonate, the material climbers use to keep sweat from blurring friction on the rock.
Its first job is simple, hold chalk at the hip or back where you can reach it fast. Its second job is to keep hands dry between burns, whether you are shaking out on a sport route or resetting at the gym. Its third job is to stay out of the way while you move. A pouch that rides cleanly on the harness and closes well between uses saves more frustration than a bigger one with no discipline.
That trade-off shows up fast. A loose, poorly sealed pouch can spill chalk on the approach, coat the inside of your pack, and leave a mess on shared mats or belay stances. Chalk balls, liquid chalk, and solid gym blocks all solve parts of the same problem, but they do it differently. For a closer look at the hand-delivery side of the setup, see this guide on chalk balls for climbing.
Buyers usually get stuck on the practical questions, format, closure, attachment, capacity, and whether the opening lets a hand in cleanly. Those are the details that decide whether the bag feels invisible or annoying after the third route.
A pouch is part of a larger system, too. A climber who starts with liquid chalk underneath loose chalk gets a drier base layer for long sessions, then adds powder for quick top-ups between attempts. That approach matters more than a bigger pouch for climbers who stay on the wall for a while, because the bag only works as well as the chalk routine inside it.
From Gymnastics Block to Climbing Standard
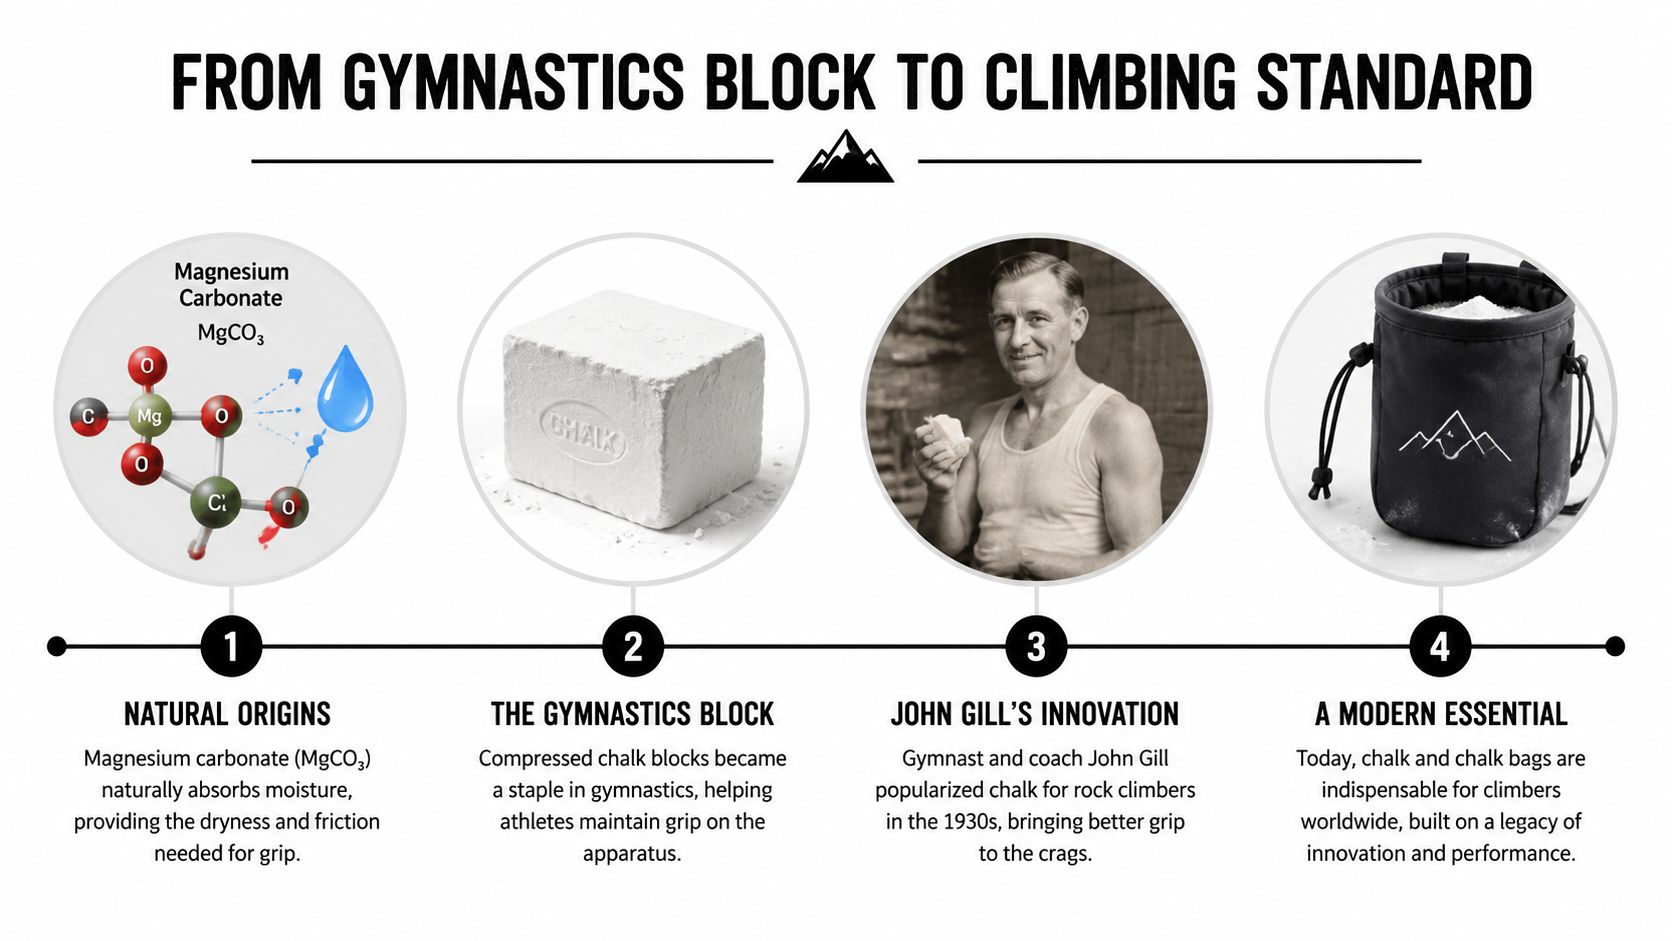
The climbing pouch didn't appear out of nowhere. Modern chalk use in climbing traces back to the mid-1950s, when John Gill is widely credited with bringing gymnastics chalk into climbing in 1954 after using it on boulders and later on longer climbs in the Teton Range, and by 1958 he was using it at Devil's Lake, where it was described as extraordinarily effective on slick quartzite. The historical line matters because it shows how a grip aid became standard equipment once climbers realized dry hands could change what was possible on the wall. That progression also helped make the pouch itself a normal part of climbing culture, especially as free climbing expanded in the 1960s and 1970s. Climbing.com's history of chalk use covers that shift clearly.
The chemistry is straightforward. Magnesium carbonate absorbs moisture, which is why it helps fingers stay predictable on edges, slopers, and tiny feet-dependent positions. The pouch is the bridge between that raw material and climbing technique. Without the pouch, chalk is just a substance in your pack or pocket. With it, the chalk becomes something you can access one-handed, quickly, and repeatedly.
Why modern bags look the way they do
The old gymnastics model still shows up in today's construction. Climbers moved from improvised cloth pouches and pocket carry to dedicated chalk bags with secure closures, then to designs that use synthetic shells, fleece linings, and stiff rims to solve modern problems. Today's materials aren't about style first. They're about holding shape, resisting abrasion, and making a hand entry feel automatic after you've already committed to a move.
Bouldering also changed the picture. Once climbers needed repeated dips between short, powerful efforts, a ground-sitting bucket became the cleaner answer. That split, pouch for roped climbing, bucket for bouldering, is still the simplest way to think about the category. The right tool depends on how you climb, not just how much chalk you want to carry.
Roped Bags Versus Bouldering Buckets
The easiest mistake is shopping by size alone. Session style matters more. A roped chalk bag is built to stay attached to your waist while you move vertically. A bouldering bucket is built to sit on the floor, a pad, or a bench and stay open for repeated hand dips between attempts.
| Feature | Roped Chalk Bag | Bouldering Bucket |
|---|---|---|
| Best use | Sport, trad, multi-pitch, gym roped climbing | Indoor bouldering, circuit training, home wall sessions |
| Carry style | Waist-mounted | Ground-sitting or waist-hung |
| Opening | Smaller, controlled access | Wide mouth for repeated dipping |
| Stability | Designed to minimize swing | Designed to stay upright |
| Chalk access | Fast single-hand reach | Easy whole-hand access |
| Main trade-off | Less volume, less bulk | More exposed to spills if transport is sloppy |
A roped bag earns its keep on climbs where swinging gear becomes a problem. It stays closer to the body, keeps the opening compact, and avoids snagging when you twist or reach around protection. A bucket makes more sense when you're chalking up after every few moves, especially in a gym where the base of the problem is the staging area.
That's why many climbers own both. They'll use a pouch on lead and a bucket during bouldering sessions, then leave the bucket at home when the route is long enough that extra bulk becomes a nuisance. The bigger container is not automatically better. If a heavy bag pulls your harness off-center mid-crux, you'll feel it immediately.
A climber who spends the day switching from hangdogging a route to lowball boulders doesn't need one perfect container, just the right one for each session.
This also explains why some comparison pages feel incomplete. They stop at “bag versus bucket” without asking whether the climber is on rope, on the ground, or moving between both. The right answer is usually a matching system, not a single universal buy.
Features That Separate a Good Pouch From a Frustrating One
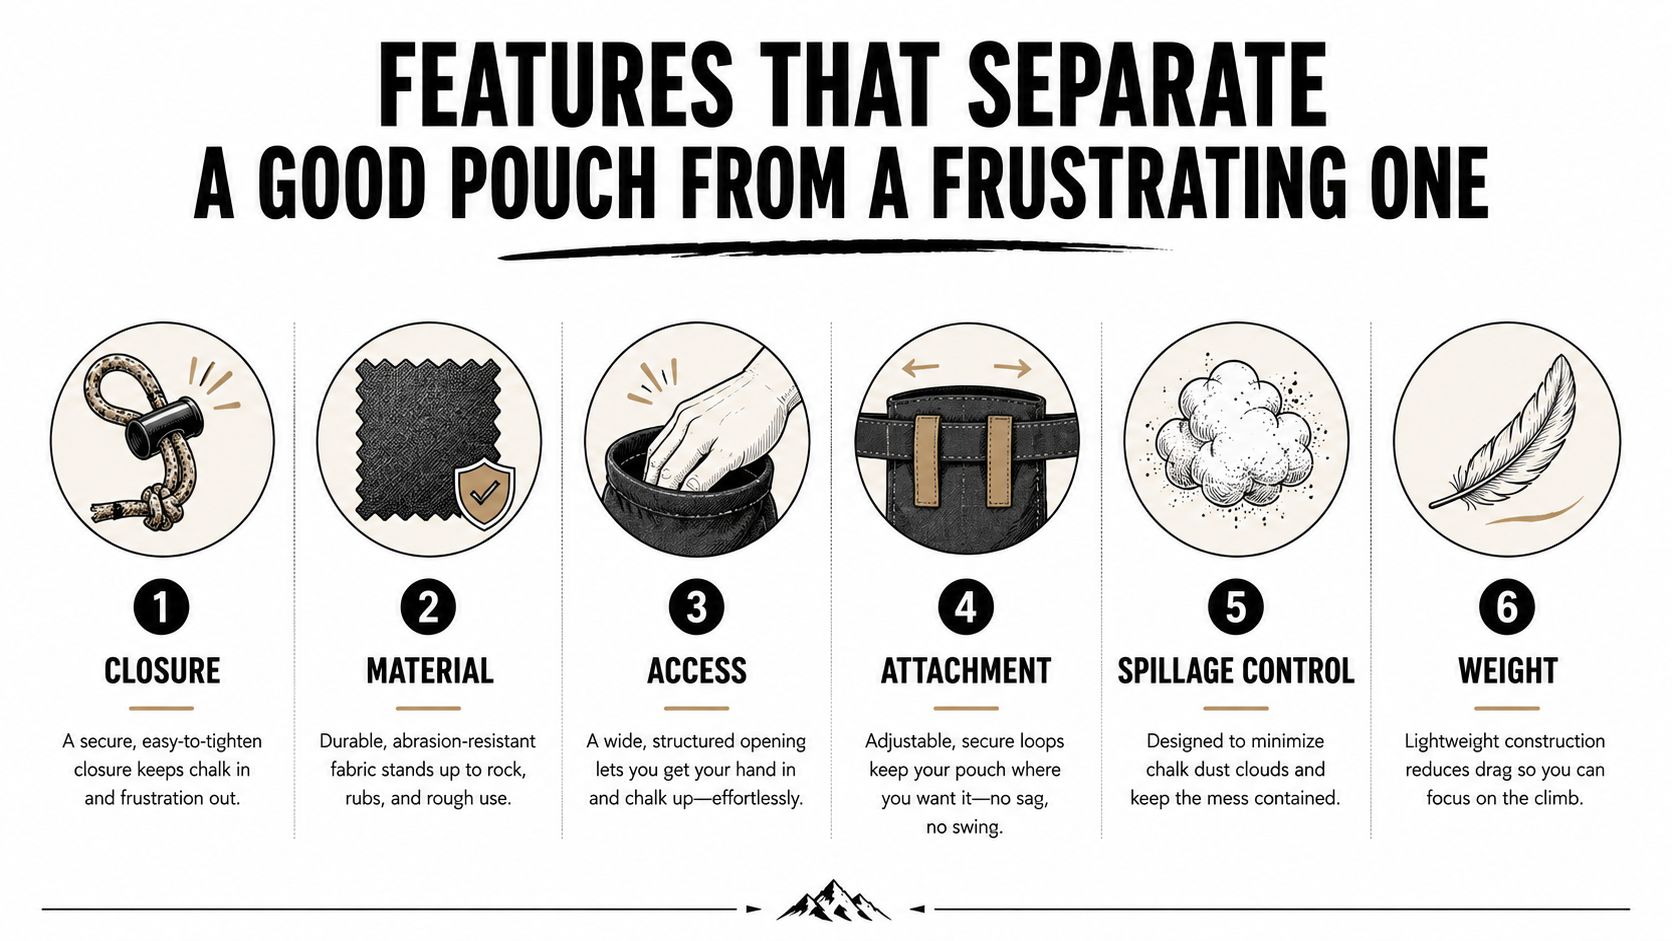
The details decide whether a pouch fades into the background or gets on your nerves every session. I've watched climbers ignore the small stuff, then complain later that the bag “just feels bad.” Usually, the problem is one of six features.
Closure and attachment first
A cinch-cord with a plastic toggle is still the clean default because it seals fast and opens fast. Flap closures add security, but they also slow every chalk-up, which is fine for transport and annoying mid-session. Attachment matters just as much. A belt loop and clip combo tends to sit more still on a harness, while lighter carabiner-style loops can bounce around the hip when you're moving hard.
Then think about access and containment
Capacity should be judged by fill behavior, not the number on a product page. A half-full pouch chalks better than an overstuffed one because your hand can enter cleanly and the powder can move. The opening matters too. Current practical advice often points climbers toward an opening around 5 to 6 inches for average-sized hands, while keeping the bag only half to two-thirds full helps reduce spills and makes the chalking motion cleaner. That advice aligns with the core issue: speed and containment matter more than raw volume. This review guide on boulder chalk bags gives a useful heuristic for hand access.
Drainage is the sleeper feature. A grommet or mesh base lets humidity out before chalk turns into a clumpy mess. Rim stiffness matters too, because a firm mouth lets you chalk one-handed instead of wrestling the pouch open with both hands. For shell fabric, abrasion resistance wins. Cordura nylon and ripstop synthetics handle repeated rubbing better than softer, prettier fabrics that pill early.
A quick checklist helps:
- Closure: choose cinch-cord for speed, flap or zip only if transport spill control is a priority.
- Attachment: prefer a stable belt or clipped loop if you climb on rope.
- Capacity: size it to your hand and your fill level, not your ego.
- Drainage: use it in humid gyms, skip it only if you intentionally want a sealed storage-style pouch.
- Rim stiffness: look for a mouth that stays open with one hand.
- Shell fabric: pick abrasion resistance over novelty texture.
The right bag doesn't need every feature. It needs the features that match how you climb.
How to Use Powder and Liquid Chalk Together
Loose chalk and liquid chalk do different jobs, and they can work together cleanly. The mistake I see most often is people treating them like competing products. They're not. A good routine uses liquid chalk first, then loose chalk from the pouch to refresh grip as the session goes on. EVMT's climbing liquid chalk guide lines up with that approach.
Start with clean hands. Wash, then dry them fully. Apply a thin, even coat of EVMT Liquid Chalk to the palms, fingertips, and the webbing between the thumb and index finger. Give it 30 to 60 seconds to dry tacky before touching the wall or reaching into the pouch. Rushing that step is the fastest way to end up with a slick film instead of a usable base.
A simple rhythm for longer sessions
Think of liquid chalk as the primer and loose chalk as the refresh button. The liquid layer helps resist sweat over time, while the loose powder on top absorbs what breaks through and makes quick top-ups easy between burns. That's useful on long gym sessions, outdoor days with repeated attempts, and training blocks where you don't want to keep overloading your skin.
A few practical habits make the combination work better:
- Apply liquid chalk sparingly. Thick layers crack and waste time.
- Let it dry completely. If it still looks wet, it's too soon.
- Use the pouch at rests or between attempts. Don't over-chalk every move.
- Close the pouch between burns. Dry powder stays cleaner and lasts longer.
For long sessions, liquid chalk doesn't need constant reapplication. The point is to use it as a base layer and then touch up with powder when needed, not to keep starting over. For sustained routes, especially on vertical terrain, that means fewer interruptions and less dust on the hands and gear.
Coach's rule: if your hands are drying out between attempts, build a base first, then top up. Don't try to solve a sweat problem with more and more powder alone.
A chalk pouch is still the delivery tool here. The liquid helps control the environment on your skin, but the pouch handles the repeatable, on-wall access you need once fatigue starts to show up.
Sizing, Fit, and Competition Rules
Sizing gets confusing because people ask the wrong question. They ask, “What's the biggest opening I can buy?” The better question is, “What opening fits my hand and my climbing?” A pouch should let your whole hand enter without scraping the rim, but it shouldn't be so open that powder escapes every time you brush past it.
Harness users should keep the bag low-profile. If the pouch sits too tall or hangs too low, it starts to interfere with the chest, the belay loop, or gear loops when you sit back. Bouldering buckets are different by design. They're wider, taller, and meant to stay on the ground or on a pad, where stability matters more than compactness.
What competition and gym policy can change
Rules matter because chalk is part of sanctioned climbing mechanics. USA Climbing allows a competitor to use a chalk bag plus commercially available dry or liquid climbing chalk for their hands, and it specifically prohibits other performance-enhancing agents such as resin or rosin. That means your chalk setup isn't just personal preference in competition, it's part of the legal gear mix. USA Climbing's rulebook makes that clear.
Gym rules can be stricter. Some facilities prohibit loose chalk entirely and require chalk balls, chalk socks, or liquid chalk instead. Dartmouth's climbing gym, for example, allows no loose chalk and even provides chalk socks and liquid chalk for free. Dartmouth's climbing gym policy is a good reminder that local rules can override what works at your home wall. Other gyms enforce the containment side even more tightly, requiring powder chalk to stay inside a chalk ball, bomb, or sock that remains inside the bag or bucket, and banning loose chalk altogether. One gym policy example shows how specific those rules can be.
| Context | Pouch Type | Opening Size | Rule or Note |
|---|---|---|---|
| Roped climbing | Waist-mounted bag | Hand fits without scraping | Keep it low-profile and secured |
| Indoor bouldering | Bucket | Wide enough for fast repeats | Stable base matters more than compactness |
| Competition | Bag with approved chalk | Must contain chalk properly | Dry or liquid climbing chalk is permitted under USA Climbing rules |
| No-loose-chalk gym | Bag with chalk ball, sock, or liquid chalk | Must reduce dust | Follow the gym's containment policy |
Pack a backup closure toggle if yours is prone to loss, and keep a small sealed chalk container for travel. A pouch that works at one gym can be wrong at another, so the most useful setup is the one that stays legal and clean across different walls.
Maintenance, Troubleshooting, and the Final Checklist
A bigger pouch is not automatically a better pouch. If the opening is too wide, the bag overfills, and the closure stops behaving the way it should. In practice, a medium roped bag often feels better at the gym than a huge one because it stays compact, opens cleanly, and doesn't dump powder every time you hang it from a harness.
Keep the bag half to two-thirds full. That simple habit solves more mess problems than most add-on features.
Weekly maintenance is boring, but it pays off. Empty residue into a sealed container, tap the lining clean, and wipe the rim with a dry microfiber cloth. If you rotate your chalk stock so older chalk gets used first, you also avoid the stale, clumpy feel that comes from letting powder sit too long in a damp bag.
Troubleshooting usually comes down to a few repeat offenders. Chalk dust can cake at the seam, especially if the bag rides in a humid gym. Drawcord cinches can lock up when chalk works into the cord channel. Belt loops can tear at the bartack if the bag is overloaded or yanked off the harness too often. An ammonia smell is a sign that sweat and bacteria have built up in the lining, which means the bag needs a proper cleanout and drying time.
If you want a product that helps reduce residue buildup on the skin side of the equation, a no-dust grip option like EVMT can fit into that routine, and if your pouch ends up loaded with old liquid-chalk residue, this removal guide is worth keeping handy.
Two-minute pre-purchase check
- Closure type: matches your session, quick cinch for climbing, more containment if transport is the issue.
- Attachment: belt or clip feels stable on your harness.
- Drainage: present only if your climate or gym humidity makes it useful.
- Fabric weight: light enough for rope climbing, tougher if you abuse gear on rock or gym floors.
- Capacity: scaled to hand size and realistic fill level, not ego.
- Cleanability: easy to empty, dry, and keep from smelling off.
Evermost LLC makes EVMT Liquid Chalk, a clean grip option that pairs well with a climbing chalk pouch for sessions where you want less dust and more consistency. If you're dialing in a roped bag, a bucket setup, or a liquid-under-powder routine for long training days, visit Evermost LLC and compare the climbing-focused formulas against the way you train.