


Liquid Chalk Pole Grip: Application, Timing, and Removal
The slip usually shows up at the worst point in class. Hands felt fine during warm-up, then the room got hotter, the music run started, and a grip that felt locked on the first attempt suddenly turned uncertain on the second. In a shared studio, that problem gets more complicated fast because the answer can't be a cloud of loose chalk drifting onto the floor and the next athlete's pole.
That's where liquid chalk pole grip becomes useful. Liquid chalk is a magnesium-carbonate grip aid carried in an alcohol-based solution. It dries into a thin film in about 10 to 15 seconds and is widely used because it creates little to no airborne dust and only minimal residue once dry, according to this magnesium-carbonate liquid chalk overview. In pole, that matters less as a theory and more as a studio workflow. The product has to help the current combo, respect the studio rule, and clean off without drama afterward.
Table of Contents
- Why Liquid Chalk Fits the Pole Studio
- Prepping Your Skin Before You Apply
- The Application Routine That Actually Works
- Timing Your Re-Applications Through a Session
- Removing Liquid Chalk and Cleaning the Pole
- Liquid Chalk vs Other Pole Grip Aids
- Your Pole Session Chalk Routine
Why Liquid Chalk Fits the Pole Studio
The test happens after warm-up, when the room is hotter, hands are starting to sweat, and everyone is rotating through the same poles. In that setting, loose chalk creates its own problem. It drops to the floor, transfers to the wrong part of the pole, and leaves the next person dealing with your grip choice.
Liquid chalk suits studio training because it dries on the skin instead of sitting on top as dust. You get a thin magnesium carbonate layer that helps with hand moisture without sending powder into the air or across the base of the pole. That matters in shared classes, during back-to-back combo attempts, and in studios that expect fast cleanup between groups.
I use it most in classes where timing matters.
A pole session is not a climbing session with a spin pole in the corner. You are warming up, drilling short sections, stopping for cues, then running a full combo under sweat, nerves, and music. A grip aid has to fit that rhythm. Liquid chalk does, because you can apply a small amount, let it dry, and get back on the pole without coating everything you touch.
Why studios tend to prefer it
Studios usually care about three things. Clean floors, manageable residue, and equipment that can be reset quickly for the next athlete.
Liquid chalk helps on all three. It stays mostly on the hands if you apply a thin layer, and any residue it leaves is usually easier to wipe off than a scatter of powder and footprints. It also gives coaches a more predictable class flow. Fewer interruptions for cleanup. Less transfer onto crash mats, phones, water bottles, and the middle of the pole where nobody wanted extra chalk.
Practical rule: In a shared studio, a good grip aid controls your sweat without creating work for everyone else.
Where it earns its place
Liquid chalk tends to work well in a few specific studio situations:
- Repeated climbs and static holds: Hands are getting damp, but you do not need a sticky product.
- Music runs and filmed attempts: You want grip support without visible chalk dust on the floor or legs.
- Shared poles with quick turn-taking: Residue stays more contained and cleanup stays simpler.
- Studios with powder restrictions: You can manage moisture without breaking the room's chalk policy.
The trade-off is straightforward. Liquid chalk is strongest when the problem is sweaty hands. It is less useful when the issue is dry skin that needs a different grip feel, body contact that needs a tackier product, or technique that is putting the hand in a weak position. That is why studio results depend less on whether you use liquid chalk at all, and more on when you apply it, how much you use, and what kind of pole finish you are training on.
Prepping Your Skin Before You Apply
Most liquid chalk failures start before the bottle even opens. If the skin still has lotion, sunscreen, body oil, pole cleaner residue, or leftover tack product on it, the chalk layer won't set evenly.
This part needs a routine, not guesswork.

Start with clean, plain skin
Wash hands with a gentle soap, rinse thoroughly, and dry them completely. A lint-free towel helps because it doesn't leave fuzz on the palms or between the fingers. The goal isn't soft hands. The goal is a clean surface the chalk can bond to.
Athletes who jump straight from hand cream or sanitizer to chalk often get the same bad result. The product beads, smears, or dries unevenly.
For a broader breakdown of how grip products behave in class settings, this pole fitness grip guide is a useful reference.
What to avoid right before class
Several common habits wreck the film before the first climb:
- Fresh lotion: Even a light hand cream can make the chalk slide.
- Cuticle oil: Great later, terrible before training.
- Sunscreen transfer: If it's on the hands, it needs to be washed off.
- Alcohol gel residue: Some sanitizers leave a slick feel after the alcohol flashes off.
Clean skin grips better than product-covered skin, even before chalk enters the picture.
Small prep details that matter
A few practical adjustments improve consistency:
- Flatten thick calluses: A rough edge can catch, peel, or create hot spots on the pole.
- Don't over-file: Raw or over-exfoliated skin usually grips worse and gets irritated faster.
- Blot warm hands first: If warm-up has already started sweating the palms, use a dry microfiber cloth before applying chalk.
- Let cold hands settle: Chalk spreads better on skin that isn't clammy from walking in from outdoors.
This is the unglamorous part of liquid chalk pole grip, but it's the part that determines whether the application feels clean or patchy.
The Application Routine That Actually Works
Liquid chalk usually fails in class for one simple reason. The layer is too thick before the first proper combo even starts.
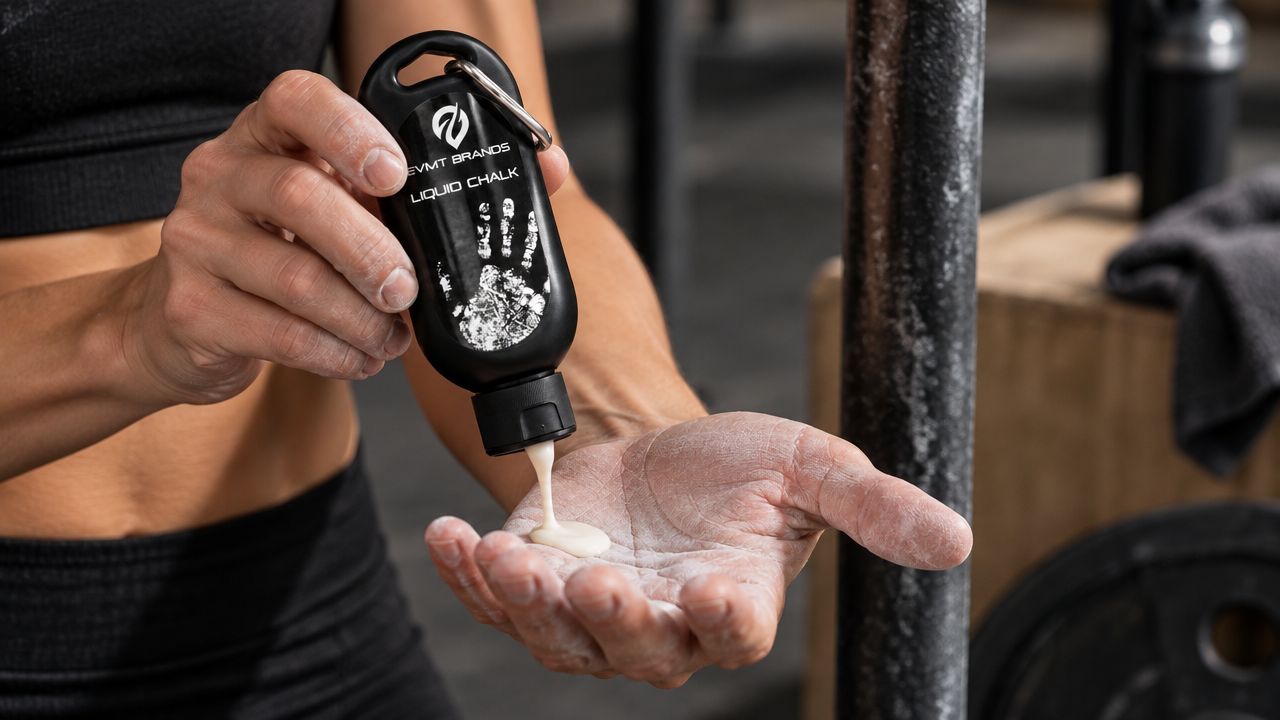
A studio routine needs to survive warm hands, quick resets, and repeated contact changes. That calls for a thin, even film you can trust through spins, climbs, and re-grips, not a heavy coat that turns dusty or patchy halfway through the track.
Start by shaking the bottle briefly, then use a small amount. For most athletes, a pea-sized dab for both hands is enough for the first pass. EVMT Liquid Chalk works best in pole when it stays in that thin-film range. Once you overapply, the hand can feel dry at first but lose consistency as the layer breaks apart.
Spread it with intention. Cover the parts of the hand that load against the pole:
- Finger pads for spins, catches, and quick grip changes.
- Base of the fingers where the pole sits during climbs and brackets.
- Thumb web for clamp strength and top-hand security.
- Heel of the palm for presses, pushes, and strong downward contact.
Keep the layer light around the wrist creases and side of the hand unless you know you need product there for a specific shape. Those areas tend to crack first, especially in classes with lots of inversions, handstands, or floor-to-pole transitions.
Then wait.
Rub until the wet feel is gone, then give it a few more seconds. The finish should look matte and feel dry, almost quiet on the skin. If the hands still feel cold, tacky, or slightly gummy, the carrier has not fully flashed off yet, and the first contact on the pole will usually tell on you.
I use a quick studio test before a full run. Light thumb press. Small twist. Release. If the hand leaves a visible white print straight away, the coat is still too wet or too heavy.
Thin coats hold up better during choreography because they interfere less with re-grips. That matters on stainless and chrome in particular, where a bulky layer can feel fine on a static hold and then start slipping once the sequence gets faster.
Keep body application separate from hand application. If you want to test liquid chalk on a knee pit, side, or other contact point, do that on an easier training day and test one area at a time. Mixing hand chalk, body chalk, and a fresh pole wipe right before a performance run is how grip gets unpredictable fast.
Timing Your Re-Applications Through a Session
Halfway through a combo is the worst time to realize your first chalk layer has gone. The fix is not more product every few minutes. It is applying again at the points in class where grip demand changes.
The first useful re-application window usually comes after warm-up and before your first serious trick block or full-out combo run. By then, your hands have settled into their real session pattern. Floor prep, mobility, and a few spins do not tell you much. Repeated climbs, brackets, dead hangs, and inversion entries do.

Use session cues, not a timer
In a studio, re-application is tied to choreography and reset points more than the clock. Good athletes often miss the early signs because they start squeezing harder before they admit the grip has changed.
Reapply when you notice:
- Shine coming back to the contact points. The matte finish is fading on the palm, finger pads, or thumb web.
- Small slips on familiar entries. A basic climb or bracket feels less certain than it did ten minutes earlier.
- Drag instead of clean contact. The hand feels pasty, sticky, or uneven rather than dry and controlled.
- Extra grip effort. You are over-gripping simple holds that were secure earlier in the session.
That matters during music runs. If the hand feel changes during a phrase with fast re-grips, shoulder rolls, or drops to a low bracket, fix it before the next full attempt, not in the middle of another messy run.
Pole finish changes the schedule
Liquid chalk does not age the same way on every pole. On stainless and some chrome poles, a thick layer can feel fine on a static test and then start sliding once the combo gets faster and the hand heats up. On grippier finishes, the same amount can feel overly dry and force awkward re-grips.
I treat slick steel poles with more discipline. Thin first coat. Full dry-down. Earlier check-in after the first hard block. In real studio use, liquid chalk also tends to give less help on bare steel than many athletes expect, especially once sweat breaks through, so testing your timing on that surface matters more than assuming the product will carry the session.
Body product changes the rhythm too. If you have chalk on knee pits, inner arms, or side grip points, hand re-application needs to stay lighter. Too much product in multiple contact zones can make transitions feel jerky instead of secure.
A timing map that works in class
This is the pattern I use most often:
- After warm-up: Apply or refresh only if the first working block is next.
- Before the first hard combo set: This is the main window for a clean re-application.
- After several repeated attempts: Reassess once the hands have gone through real work, not after every run.
- Before filming or performance-style takes: Reset only if the contact points have clearly changed. Panic layering usually makes the next take worse.
- Between class blocks: If you switch from tricks to choreography, or from static strength to spin flow, check the hands again because the friction demands are different.
One more trade-off matters. If the problem is sweat mixed with residue, adding more chalk on top usually gives you a patchy film that fails faster. Wipe the hands, let the skin settle, then reapply a light coat only where the pole sits.
Removing Liquid Chalk and Cleaning the Pole
End-of-session cleanup affects the next class, the pole finish, and the skin condition the athlete brings into the next training day. Leaving liquid chalk on the hands for hours usually isn't catastrophic, but it often pushes the skin toward dryness and roughness over time.
A proper reset doesn't take long.
Washing it off the hands
Use warm water, mild soap, and a soft cloth or soft nail brush if residue sits around the cuticles or under the nails. Wash the palms first, then the finger pads, then the backs of the hands, and finally the nail edges where product likes to collect.
If residue beads instead of lifting, that usually means there's still a stubborn film mixed with skin oil. A gentle cleanser and a bit more friction usually fix it. If the skin still feels coated, this guide to remove liquid chalk covers practical cleanup options.
Product left on the skin too long often feels like “dry hands.” It's really buildup.
Cleaning the pole correctly
For the pole itself, the safest habit is using a clean soft cloth and the studio-approved cleaner. Many studios rely on alcohol-based wiping because it clears hand residue without leaving a slippery film behind.
A few guardrails matter:
- Use a soft cloth: Rough towels can be unnecessarily hard on some finishes.
- Follow studio rules for cleaners: Shared poles often have a preferred cleaning method.
- Skip household sprays with unknown additives: Residue can affect the next athlete's grip.
- Wipe after experiments: Any hand, body, or pole-applied chalk test should end with a full reset.
Restore the skin after training
Moisturizing belongs after the session, not right before it. Once the hands are clean and fully dry, a simple moisturizer can help prevent chronic over-drying from repeated chalk use. Heavy oils right after washing aren't always ideal if another session is coming soon, but a basic post-training hand-care habit usually keeps the skin more predictable across the week.
A break day from grip products also helps when the hands start feeling over-stripped, cracked, or reactive.
Liquid Chalk vs Other Pole Grip Aids
By the middle of class, the grip question is rarely "Do I need something?" It is "What problem am I solving right now?" Slippery hands before spin combinations need a different fix than a thigh that will not hold on a jade, or a pole that already feels coated from three previous students.
That is why liquid chalk earns a place in a studio bag. It solves one job well. It dries the hands fast, stays tidier than loose powder, and usually lets you get back on the pole without changing how your grip feels. In shared studios, that matters.
Side-by-side trade-offs
| Grip Aid | Best Use Case | Feel on the Skin | Studio Mess Level | Main Drawback |
|---|---|---|---|---|
| Liquid chalk | Sweaty hands during climbs, spins, and short combo runs | Dry, light, close to bare skin when applied thin | Low if fully dried and wiped down after | Can over-dry the hands or leave buildup if layered too often |
| Loose powder chalk | Athletes who want a very dry feel and have permission to use dustier products | Dry and dusty | High | Spreads onto floors, clothing, and nearby poles |
| Chalk ball or chalk sock | More controlled dry grip than loose powder | Dry, slightly softer deposit than open powder | Medium | Still drops residue and is slower to use between quick turns |
| Tacky balms or sprays | Skin that is not sweaty but needs extra stick on certain tricks | Sticky or grippy, depending on formula | Medium to high | Transfers more easily to the pole and can feel wrong for fast hand changes |
| Body grip products | Static holds on legs, side body, or torso | Varies by formula | Medium | Not a direct substitute for hand sweat control |
| Gloves or grip aids worn on the hands | Coverage when skin is irritated or grip rules allow them | Less skin feedback | Low on the floor | Changes hand feel and is not accepted in every studio |
Where liquid chalk usually works best
Liquid chalk makes the most sense when hand sweat is the limiting factor and class pace is quick. That includes spin pole sets, climbing drills, and combo practice where you need a fast reset between attempts without dusting the whole area around your pole.
It also fits the rhythm of a shared studio better than many alternatives. You can apply a small amount, let it set while the instructor demos the next phrase, then test your first contact without leaving visible powder on the base and floor. That timing advantage is one reason many athletes keep it as their default hand product and use other grip categories only for specific tricks.
If you want a broader breakdown of grip categories, this pole dance grip aid guide covers where each type tends to fit.
Where liquid chalk falls short
Liquid chalk is a poor match for already-dry hands, especially in winter or in heavily air-conditioned studios. The hands may feel secure for one round, then start dragging or catching on the next. I see this a lot on static pole, where athletes mistake over-dry skin for "not enough grip" and add another layer that makes the problem worse.
It also does not replace body grip. If your hands feel solid but your knee pit, side, or inner thigh keeps sliding, switching to more hand chalk usually does nothing except add residue. The better fix is matching the product to the contact point.
Pole finish matters too. Brass, chrome, stainless, and coated poles do not all respond the same way, and neither do poles that are cold at the start of class versus fully warmed by use. Liquid chalk can feel perfect in the first half of a session and too grabby later once your skin and the pole both heat up.
Picking the right category for the session
A simple rule works well in practice:
- Use liquid chalk for sweaty palms and quick re-grips.
- Use powder-based options only if your studio allows them and you can manage the mess.
- Use tacky products for adhesion problems, not sweat problems.
- Use body-specific grip when the slip is happening somewhere other than the hands.
- Use nothing at all if the pole, room, and skin already feel balanced.
Formula texture matters inside those categories. Some dry products use more than straight chalk, and ingredients such as a plant-based starch in skin care can change how soft, absorbent, or filmy a product feels on the hands.
The trade-off is not which aid sounds strongest. It is which one lets you finish the combination cleanly, then reset the pole for the next person without creating a new problem.
Your Pole Session Chalk Routine
A good liquid chalk pole grip routine should be simple enough to follow when class is moving fast.
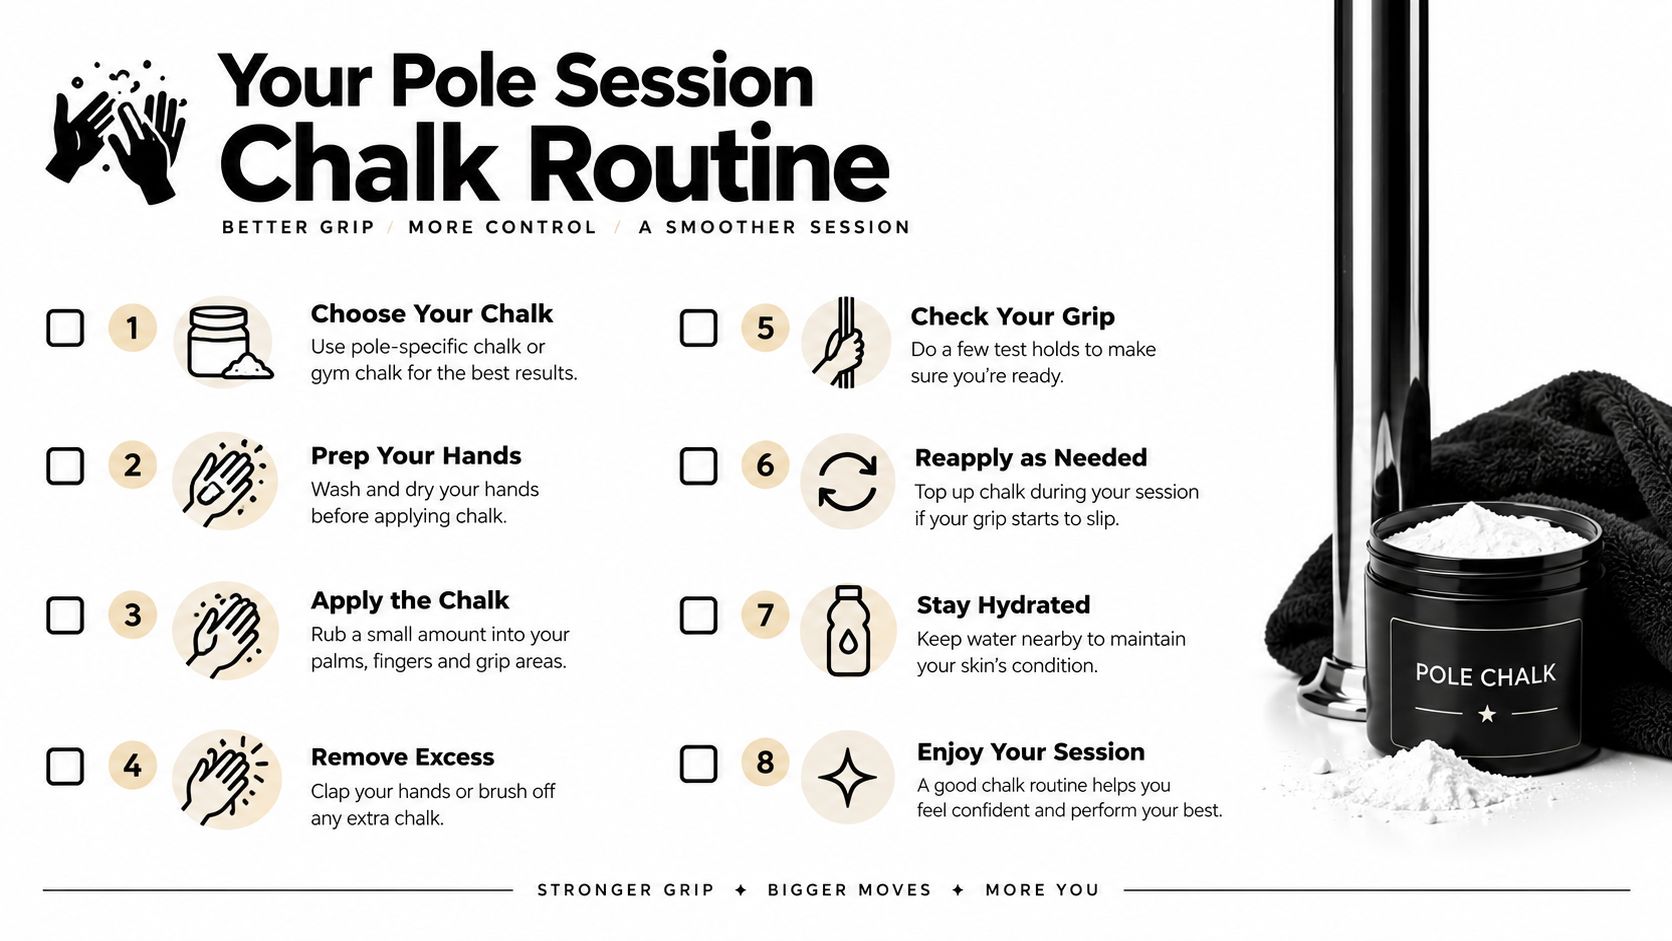
- Arrive with clean hands: No lotion, oil, or residue from earlier products.
- Warm up first: Save the first chalk layer for the point just before real grip work starts.
- Apply a thin coat: Cover the actual hand contact zones, not every inch of skin.
- Let it dry fully: Don't rush straight to the pole while the carrier still feels wet.
- Test before a full combo: A light thumb-and-twist check reveals bad transfer fast.
- Reapply by signal, not anxiety: Look for returning shine, dampness, or early micro-slips.
- Wipe the pole at the end: Leave the surface predictable for the next athlete.
- Wash and restore the hands: Remove residue and moisturize after training, not before.
A few situations should change that default plan. Studio chalk rules always come first. Cracked cuticles or irritated skin may mean skipping chalk that day. Some pole finishes need more testing than others, and some conditioning-heavy work may call for a different grip strategy if dryness alone isn't solving the problem.
Evermost LLC offers magnesium-carbonate liquid chalk in single bottles and multi-packs for athletes who need strong grip without powder mess. For pole training, that means a fast-drying option that fits shared studios, sweaty hands, and cleaner post-session cleanup. Explore the range at Evermost LLC.